Tuesday, November 24, 2009

A New Look for Christmas

I can hardly believe it is that time again. Time to hang lights and decorate my house for Christmas. I admit I got a little head start and started before Thanksgiving, but I figured since it never is actually cold here that I could decorate early : )

Most of my decorations are the same as last year but I thought I would show you the few new things I have done this year.

Last year after Christmas I was able to get decorations from a few Starbucks. I did not know this before but some retail stores just chuck their decorations after Christmas and anyone can request to pick them up instead. When I saw the theme at Starbucks was birds...I knew I had to ask. By the time I asked, most of it had already been promised to someone else but I did get a few things and they fit so perfectly in our home.

Here is a pedestal with a sparkly ball of yarn on top with a Starbuck's bird.

Another bird tops my little potted tree on my counter top in my kitchen.


This is one of the birds up-close. I have 12 of them in two different sizes that are hanging on my handmade ornament tree in my family room. They have Starbuck's coffee labels on them. I think they are really fun and unique.

I also got this display with ball ornaments on it. It is magnetic so it would stick to their display boards. I found the perfect place for it on the ledge of the niche in my family room. There is even a steel reinforcement there in the wall so it sticks.

I cut the balls off of another display to use as a centerpiece on my kitchen table. I love the different textures of the balls. Several shades and sizes of balls wrapped in green yarn and matte and shiny red and silver balls make it interesting to look at and matches my color scheme.

I added some red berry garland to the light fixture over my table.

I picked up a bigger tree and tree skirt last year on clearance because I knew I would need more room for my handmade ornaments this year. Here it is all decked out and waiting for all the cool ornaments from this year's party...woo, hoo...I can't wait.


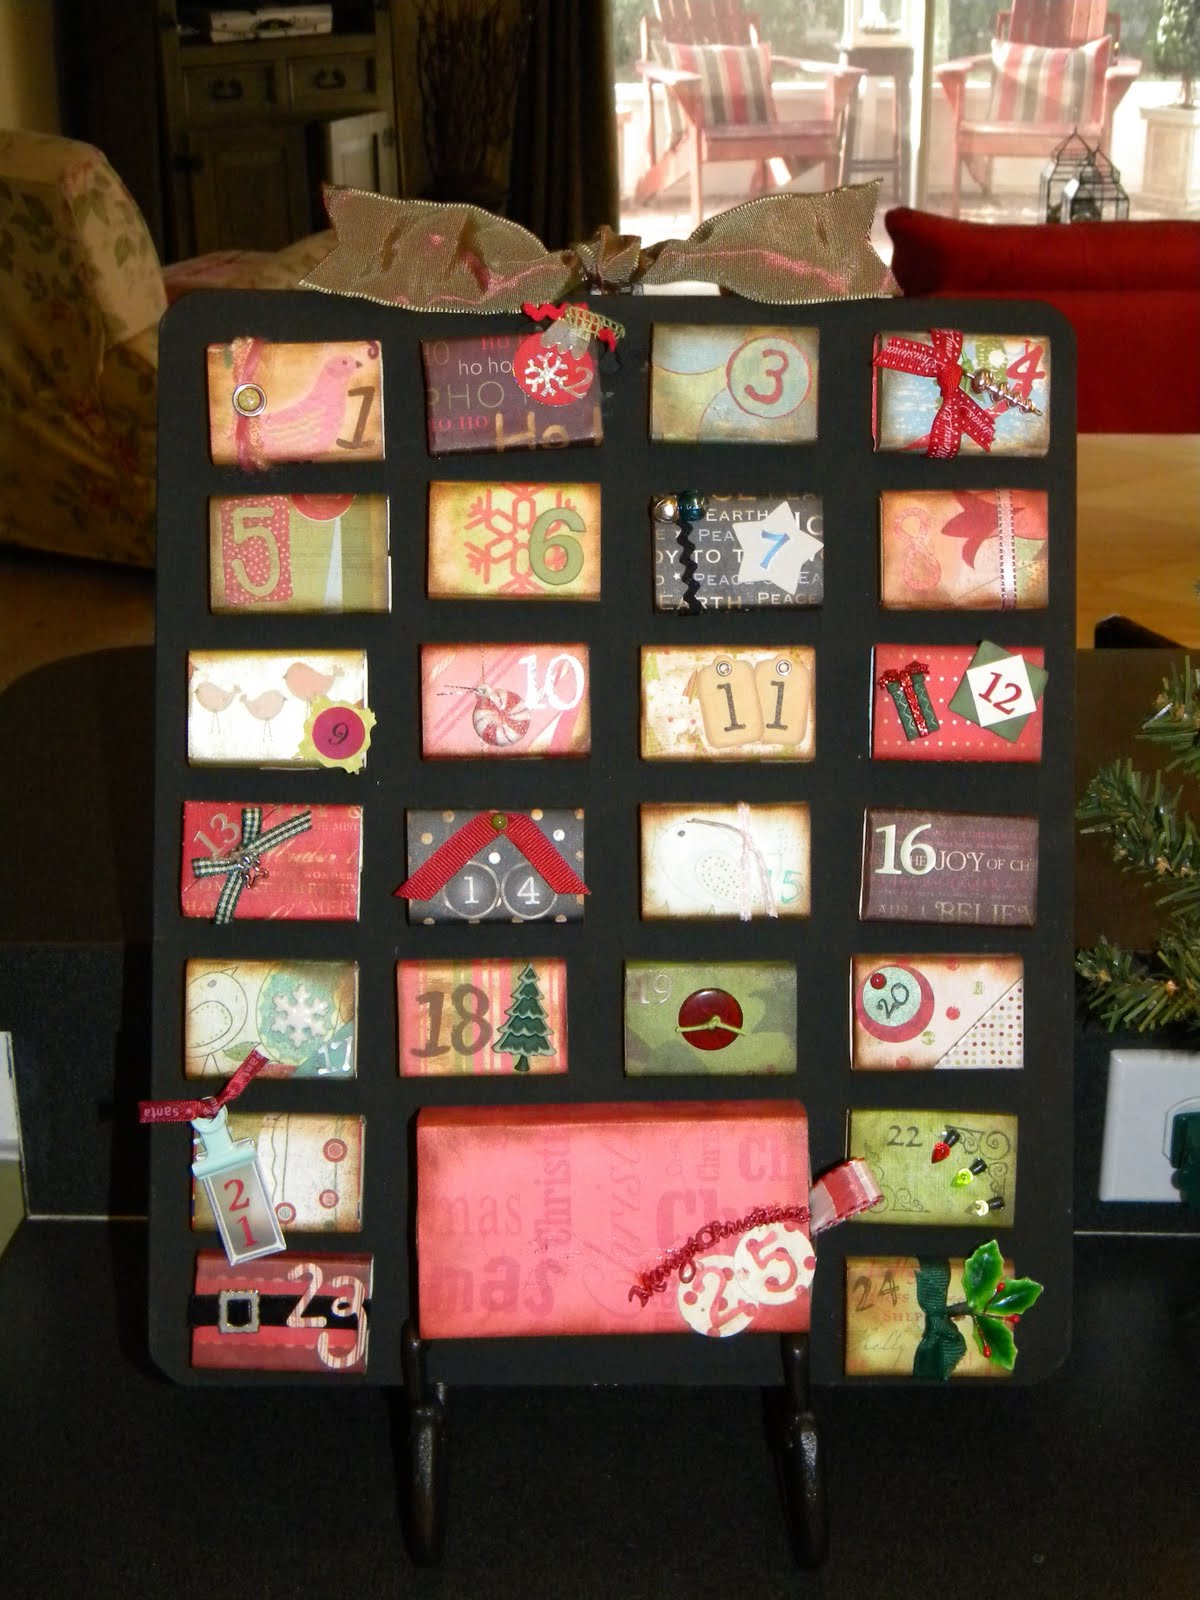
This is the matchbox calendar I posted last year. But this year I painted my clipboard that sits on my counter top with magnetic paint and my boxes have found a new home. I love it here. It is one of my favorite decorations and now I can see it every time I walk in my kitchen. A cute mistletoe ball that I made hangs in the doorway between my dining room and kitchen.

My bird display box thingys found a new home on the center of my coffee table.

The nativity scene and bell wreath take center stage when you first walk in my house.


Last, but definitely not least. My favorite new addition for the holidays. A neighbor gave me a beat up mantle a few months ago. After alot of elbow grease and black paint it is the absolute perfect addition to my living room. I picked up fireplace tools and a iron grate on Craig's List for $10 and a friend gave me some firewood. After shalacing (sp?...you know what I mean) the wood, I put it all in place. And it cost me a grand total of $10. I could hardly wait to hang our stockings. I just want to sit in this room all day now.


This mantle will be fun to decorate all year long...but no doubt the stockings are my favorite!

Well, I hope you all have a wonderful Thanksgiving and enjoy decorating your own homes. Thanks for taking the time to visit mine.
Would love for you to drop by for coffee sometime and see it for yourself.
Until then...


Thursday, October 8, 2009

The First Day of School

On August 10, 2009...
Our journey began!

Here is a picture of my girls the morning of our first day of school.
Pretty normal first day of school pic except no backpacks :)

After a family vote and the principal's approval, we decided to name our school

BYRD'S NEST ACADEMY

We had a great day as we began to figure out how to do this new adventure.

One thing that we did was make journals.

Here are some pictures:


I still feel like I am feeling my way through but am excited to see where this year takes us.
I will keep you informed as we go.


Wednesday, October 7, 2009

Ready, Set, Homeschool!

Last May we took the plunge and decided that this school year we would be
homeschooling our girl's:
Grace-5th and Olivia-3rd

At first there was a lot of kicking and screaming
(I was the one kicking...really? me?, and my girl's were screaming...with excitement)

But...
I knew in my heart that it was what I supposed to do.

After attending numerous used curriculum sales, changing my mind at least a hundred times as to what curriculum to use, stressing about my ability (or lack there of) to teach my girls, asking a million questions of other moms that school at home (only to unearth a zillion more questions), I finally started to embrace the idea and actually get excited.

In between traveling and the busyness of summer my crafty side came shinning out and I started to get our home-school classroom ready...AKA our kitchen table.

First, I knew that any respectable classroom had to have a blackboard. I had picked this chalkboard up at a Junior League yard sale for $1 a few years back. It is the real deal...the kind that was on a rolling stand and could be flipped to use both sides (it still has the holes in the sides where it rotated). It was pretty rough looking but I knew it had potential.

I painted it with magnetic paint and then with a fresh coat of blackboard paint. Then I painted the trim to match my kitchen and distressed it with glaze.


I even found a wooden chalk tray at the teacher supply store that I painted to match and super glued to the bottom. And yes, I decoupaged the top of the eraser with some super cute coordinating scrapbook paper.

I love it!
I really wanted things to be convenient to use to school but DID NOT want my house to look like a school room. So I also use the board for all kinds of fun messages when we have groups over or just to write fun notes.

Another thing I knew I would need is storage (for the loads and loads of stuff I just couldn't pass up for a few bucks at the used sales).

I decided to use my old laundry closet...I had moved my washer and dryer to the garage a few months before. I was looking forward to having an overflow pantry...but space is at a premium for storage so sacrifices had to be made :)

This closet is just off the kitchen so it works great to have things close but hidden.

Some pantry stuff squeezed it's way onto the top shelf but other than that it is slam full of our supplies.

Here it is closed...ahhh, no clutter.

I found this great tool turn about thingy at Michael's and knew I just had to have it. It holds all the markers, crayons, pencils, stapler, etc.
We can easily pull it out from the closet to the table and then back in the closet it goes at night.
It even has little drawers for paperclips, erasers, little post it tabs, etc.
Okay, so maybe this purchase was for me...the organization nut...but it works great!

(sorry, some of these pics are a little blurry...my camera is all whacked out...I desperately need a new one...hint, hint to my hubby!)

I had found these wooden organizers at a yard sale this summer for $4 for the set. After a quick coat of black paint they found their new home under my window sill in my kitchen. So convenient for us to store the girl's text books, printer and notebook paper and other stuff we use all the time. I couldn't believe they were such a perfect fit for this space (I love it when that happens!) My printer sits right on top, out of sight and handy.

On the underside of my bar area I hung some Pottery Barn clips to display the girl's artwork or an occasional chart or graph. It is right at eye level when sitting at the table and adds some fun to this area.

My desk area works out great just where it was. I just had to clear off the junk and clean out my file drawers for teacher manuals, etc.

I found two metal tubs at Goodwill for $1 each and knew they would work out great. They were painted lime green with tropical flowers on them...not blending in to our home-school space. So I painted them the same cream color as my kitchen cabinets and then taped off a rectangle area and painted it with more chalkboard paint. They are the perfect spot for binders and books.

A seasoned home-school mom gave me an idea that has made planning so much simpler for us. I found these recipe boxes at Micheal's in their dollar section (this dollar thing is becoming a theme), they even were super cute colors and have birds on them. I dressed up the front with the girl's monograms on tags attached with a brad. Then I numbered ruled 4 X 6 index cards from 1 to 180 (the total number of school days). Each night I simply pull out the next card and list what the next day's assignments are (or I can work a few days ahead). If our schedule changes unexpectedly, I simply pull out a new note card re-number it and write what we accomplished that day. The girls know each day they are responsible to do what is on their card. They can do it in whatever order they want as long as they get it done. It has given them a lot of responsibility and me a lot of freedom. At the end of each day they get a sticker for a completed card and I place it in the back of the front portion of the box. This allows for so much flexibility, keeps us on track as to how many days we have completed and keeps me from burning through erasers changing things in my lesson plan book.

One of the most essential things that I bought to decorate our home-school space was a sign I picked up when visiting my mom in NC this summer:

If I could only consistently enforce this, I would be rich.

Well, that about wraps my home-school prep up for you. I hope you have enjoyed the tour of our classroom that doesn't look like a classroom. It definitely feels like home though...and just happens to be where we school.

I will be posting a few pics from our first day soon.
Thanks for taking this new journey with us!


Tuesday, April 7, 2009

Front Yard Makeover

Okay, so I totally do not have a green thumb...it is more like black. I kill every plant I touch. But it was time for action in my front yard and I did not have the dough to pay a landscaper...so I had to try my luck.

Here is a picture of the front of our house about a year ago.
Needless to say that it was even more overgrown a few weeks ago when I started this project.


First, I traded some sewing for some pruning help from a friend (Sylvia AKA Wonder Woman).
She was not afraid to jump into the mess of bushes and chop away. After trimming things down we decided it was best to take out the back row of tree like bushes (I am so technical, I know) that were up against the house. Then the palm tree got pruned too. Now you (and my labradoodle, Hershey, can see in and out my front window. There is alot more barking at passerbyers but I have truly enjoyed the new source of light and sitting in my chair and reading a book.

Here is the yard after the pruning. Then we headed to Home Depot where I got to pick out flowers that I thought were pretty and Sylvia would tell me the likelihood that I would kill it. Needless to say we went with some hardy plants.

Now, I know it is looking pretty bare...but stay with me...this was a huge accomplishment.
I had picked up this topiary form at a local craft show about 9 months ago. I had it in a pot by my front door. I decided to give it a new home in my mini flower garden. I planted a confederate jasmine beside it and twisted it around the bottom sphere. Hopefully it will climb it and fill it in beautifully (tune into a later post for the results). In front of the topiary form I planted some tall purple flowers and two batches of daisies.

Also on our Home Depot trip we found this great pot clearanced (I just love that word) for $12. We picked a pretty red flowering plant for the center and english ivy for the sides. I also put another small potted flower in the front of the pot. Then I put down 10...yes 10 bags of mulch...it is deceiving how little those big bags cover. But after it was all said and done it looks so nice and feels so welcoming. I can hardly wait for it all to fill in.
Hopefully, I won't kill it before it does.


Sorry these pics are blurry...it was rainy the day I took them.